最近遇到
app/proxyman/outbound: failed to process outbound traffic > proxy/vless/outbound: failed to find anVPS IP可以连接, 搭建的相关网站也可以访问,但是科学上网功能无法实现。
解决方法:更换端口。
更新:另一个可能的原因是DNS污染。
最近遇到
app/proxyman/outbound: failed to process outbound traffic > proxy/vless/outbound: failed to find anVPS IP可以连接, 搭建的相关网站也可以访问,但是科学上网功能无法实现。
解决方法:更换端口。
更新:另一个可能的原因是DNS污染。
关闭服务端和客户端的sniffing,就可以连接Tor
项目地址:https://github.com/kootenpv/yagmail
通过编写python脚本和计划任务,定时发送备份的附件到指定邮箱。
参考的脚本
import yagmail
import os

file_path_array = ["backup_path1","backup_path2","backup_path3"]
backup_list = []
for file_path in file_path_array:
    dirs = os.listdir(file_path)
    bakup = os.path.join(file_path,dirs[1])
    backup_list.append(bakup)

#print(backup_list)


yag = yagmail.SMTP(user = 'xxx@xxx.com', password = 'passwd', host = 'smtp.xxx.com')
yag.send(to = 'xxx@xxx.net', subject = 'Backup File', contents = backup_list)
查看Centos版本
cat /etc/redhat-release
添加镜像
yum-config-manager --add-repo http://mirrors.aliyun.com/docker-ce/linux/centos/docker-ce.repo
yum-config-manager --add-repo https://download.docker.com/linux/centos/docker-ce.repo
安装依赖
yum -y install yum-utils device-mapper-persistent-data lvm2
安装最新版本containerd.io
https://download.docker.com/linux/centos/7/x86_64/stable/Packages/
sudo dnf install https://download.docker.com/linux/centos/7/x86_64/stable/Packages/containerd.io-1.6.8-3.1.el7.x86_64.rpm
安装Docker
sudo yum install docker-ce docker-ce-cli
查看Docker版本
docker version
阿里云容器镜像服务
https://cr.console.aliyun.com/cn-hangzhou/instances/mirrors
配置镜像加速器
sudo mkdir -p /etc/docker
sudo tee /etc/docker/daemon.json <<-'EOF'
{
  "registry-mirrors": ["https://n5odib5o.mirror.aliyuncs.com"]
}
EOF
sudo systemctl daemon-reload
sudo systemctl restart docker
我们已经有一个可以运行的宝塔面板
1. 使用命令 nginx -V,查看当前nginx 是否包含 http_dav_module 模块
2. 新建一个网站,做好域名解析,配置php为纯静态
3. 在网站设置->配置文件的最后添加
    # add 2021-12-26
    location / {
        root [your path]; #注意修改成自己的目录
        #client_max_body_size 102400M; #大文件支持
        autoindex on;
        dav_methods PUT DELETE MKCOL COPY MOVE;
        # 需要 nginx-dav-ext-module 才有下面的选项
        dav_ext_methods PROPFIND OPTIONS LOCK UNLOCK;
        create_full_put_path  on;
    }
4. 在网站目录,中添加账号密码,控制访问权限
至此利用nginx 成功搭建了webdav服务器,可以使用网页或者WinSCP等其他客户端访问
参考了几种删除方法,这里介绍我的操作。
https://blog.acesheep.com/index.php/archives/627/
https://blog.51cto.com/wangheyu1/2431770
https://www.cclliang.com/2020/08/05/%E9%98%BF%E9%87%8C%E5%B7%B4%E5%B7%B4%E7%9A%84%E5%90%8E%E9%97%A8%E7%A8%8B%E5%BA%8F%EF%BC%9AAlibabaProtect.exe%E5%88%A0%E9%99%A4%E8%BF%87%E7%A8%8B/
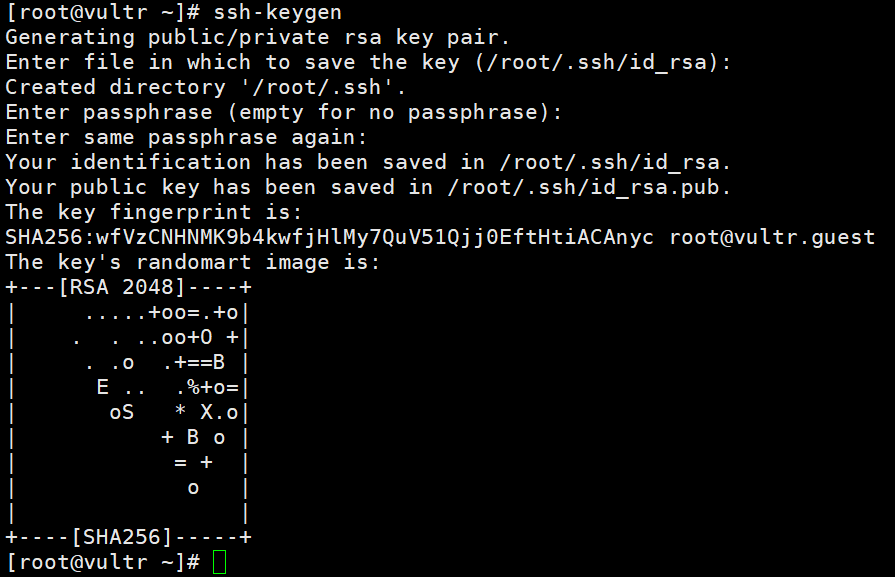
在远程服务器上运行 ssh-keygen

在/root/.ssh 文件夹下生成了两个文件,公钥id_rsa.pub和私钥id_rsa
cd .ssh/
cat id_rsa.pub  >> authorized_keys
chmod 400 authorized_keys
vim /etc/ssh/sshd_config
RSAAuthentication yes
PubkeyAuthentication yes
并确保当前配置允许root用户登陆
PermitRootLogin yes
使用scp命令从远程vps上下载公钥文件到window上
scp [-P port] user_name@vps_IP:[file_path_for_id_rsa] [local_path]
即下载 .ssh 文件夹下的 id_rsa文件
使用xshell中,重新设置属性,用户身份验证选择public key,导入id_rsa文件
或mobaXterm中的 “高级SSH设置” 中 导入private key,即id_rsa文件
使用密钥登陆成功后,禁用ssh的密码登录
vim /etc/ssh/sshd_config
修改其中 PasswordAuthentication no
重启sshd服务 service sshd restart 或 systemctl restart sshd.service
https://p3terx.com/archives/configure-ssh-keyfree-login-for-vps.html
安装完Fail2ban,比较耗内存,这个VPS只有512M,还运行了Trojan,wordpress和frp
运行 yum check-update 时遇到了killed的问题
Linux 内核有个机制叫OOM killer(Out Of Memory killer),该机制会监控那些占用内存过大,尤其是瞬间占用内存很快的进程,然后防止内存耗尽而自动把该进程杀掉。
参考 Linux进程被杀掉(OOM killer),查看系统日志
grep "Out of memory" /var/log/messages
参考 CentOS: how to fix error: BDB2053 Freeing read locks for locker
参考
今天下午,打开博客的时候很卡,页面提示数据库错误或者服务器负载过高。
打开VPS后台,发现CPU和磁盘负载很高。

然后使用Xshell登录查看,提示:
Last failed login: Fri Dec 11 23:14:56 CST 2020 from 221.131.165.85 on ssh:notty
There were 26 failed login attempts since the last successful login.
意识到可能遭到攻击,查看ssh登录日志
cat /var/log/secure |more
第一步,先使用封IP的方法,将可疑的IP添加到 /etc/hosts.deny 中
第二步,安装 Fail2ban 辅助封IP。
yum install epel-release
yum install fail2ban -y
# 安装fail2ban 完成后
systemctl enable fail2ban # 设置fail2ban开机启动
systemctl start fail2ban # 启动fail2ban
systemctl status fail2ban # 查看fail2ban的运行状态
cp /etc/fail2ban/jail.conf /etc/fail2ban/jail.local
vim /etc/fail2ban/jail.local
[sshd]
enabled = true
filter = sshd
action = iptables[name=sshd,port=22,protocol=tcp]
maxretry = 3
findtime = 60
bantime = 7200
logpath = /var/log/secure
安装和配置完成后,使用命令查看,一会儿不到一个小时的时间,又被尝试了这么多次,还有这么多不同的IP,是被谁盯上了吗?
>> fail2ban-client status sshd
Status for the jail: sshd
|- Filter
| |- Currently failed: 10
| |- Total failed: 157
| - Journal matches: _SYSTEMD_UNIT=sshd.service + _COMM=sshd - Actions
|- Currently banned: 12
|- Total banned: 12
`- Banned IP list: 112.85.42.194 40.124.5.76 46.101.164.33 117.50.36.137 221.181.185.19 119.28.178.61 222.187.232.73 221.131.165.124 218.92.0.223 221.181.185.200 221.181.185.199 190.171.133.10
今天时间比较紧,当初也没有想到被经常SSH暴力破解攻击的问题,从根源上还是应该更换ssh端口,关闭账号密码登录等来实现更安全的ssh。